In this post, you’ll get to know about a lightweight caching plugin for WordPress that makes your website faster by generating static HTML files plus WebP support. The WordPress plugin I’m talking about is called Cache Enabler – WordPress Cache. Since the plugin makes your site load faster, your site – among other things – is more likely to perform better in terms of ranking for your target keywords because page load time is an official ranking factor confirmed by Google.
Video
In case you’d rather like to watch a quick video to wrap your head around what the WordPress plugin has to offer and how you can benefit from it, just sit back and watch the video below
Installation
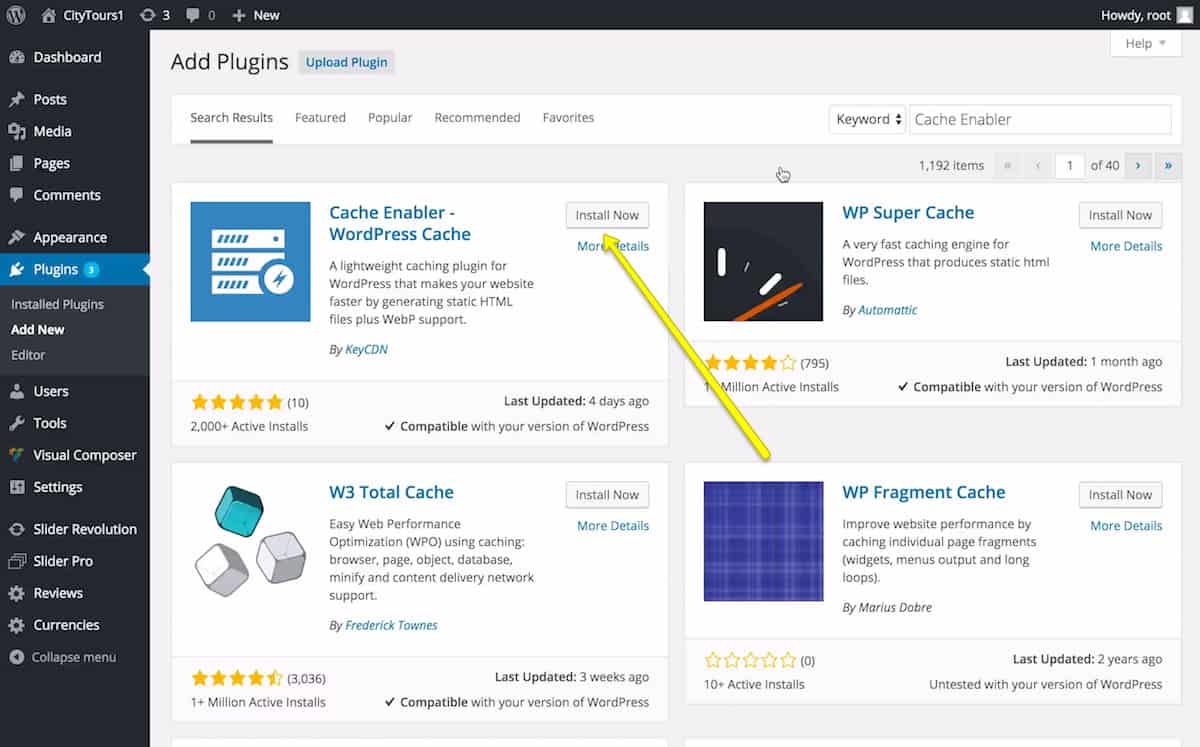
You can easily install the plugin in the standard way. You just need to click to expand the Plugins dropdown and pick the Add New option. That done, you just want to search for Cache Enabler. Once found, just hit the Install Now button. And finally click the Activate Plugin button. Now that the plugin is installed, you can configure it in Settings -> Cache Enabler.
Checking if the Cache Enabler Plugin Works
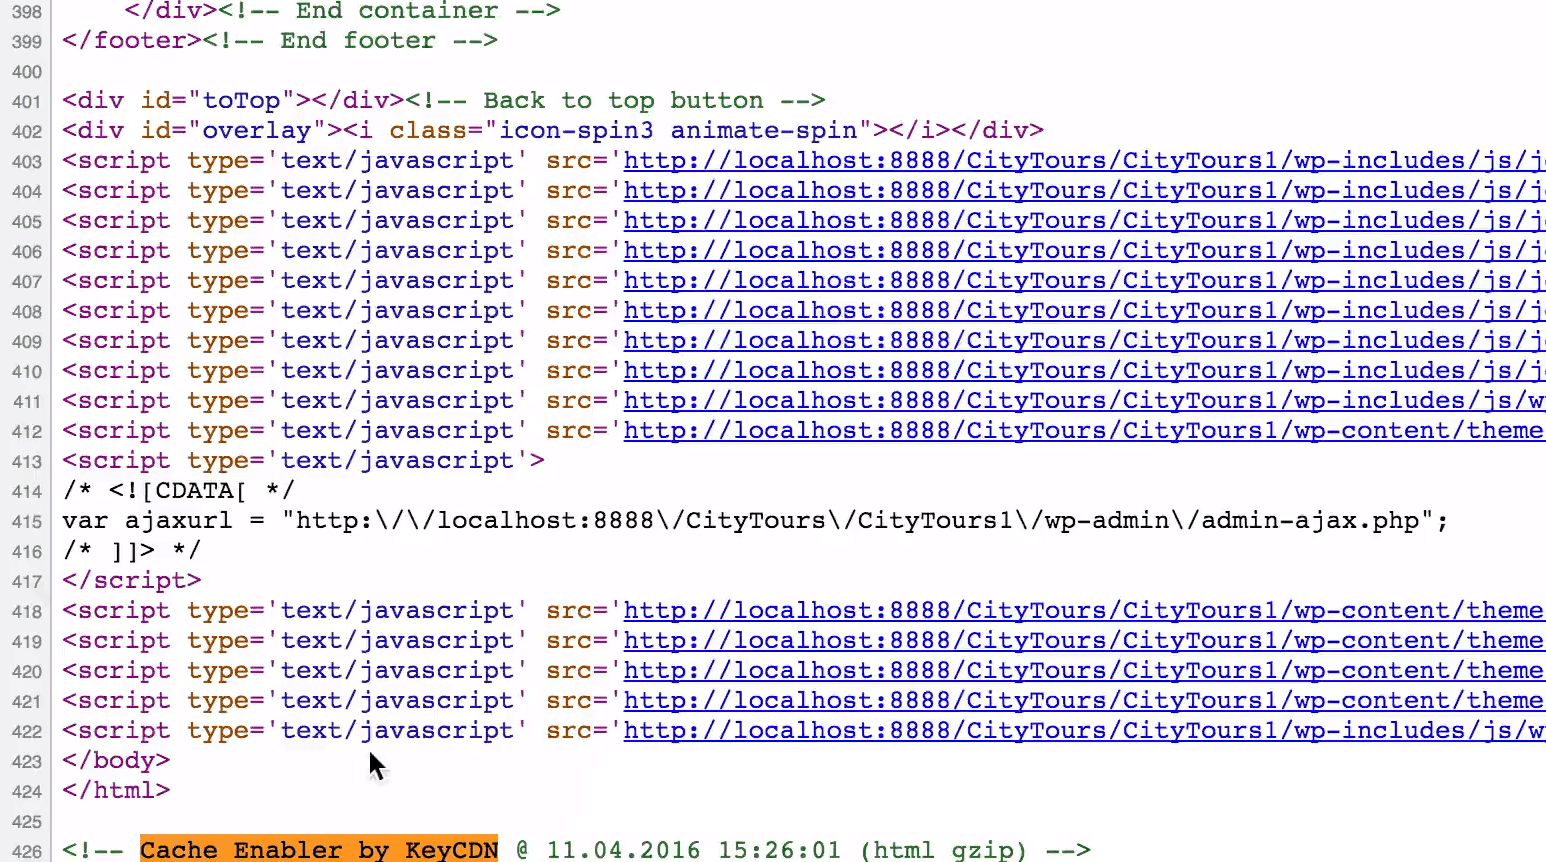
You can check if your plugin is working as follows. First off, you need to logout of your WordPress installation or just open a new incognito tab if you’re using Google Chrome. That done, you want to search your source code for “Cache Enabler by KeyCDN”. If you can find a line of code with the text, that means the plugin is working on your site.
Clearing Cache
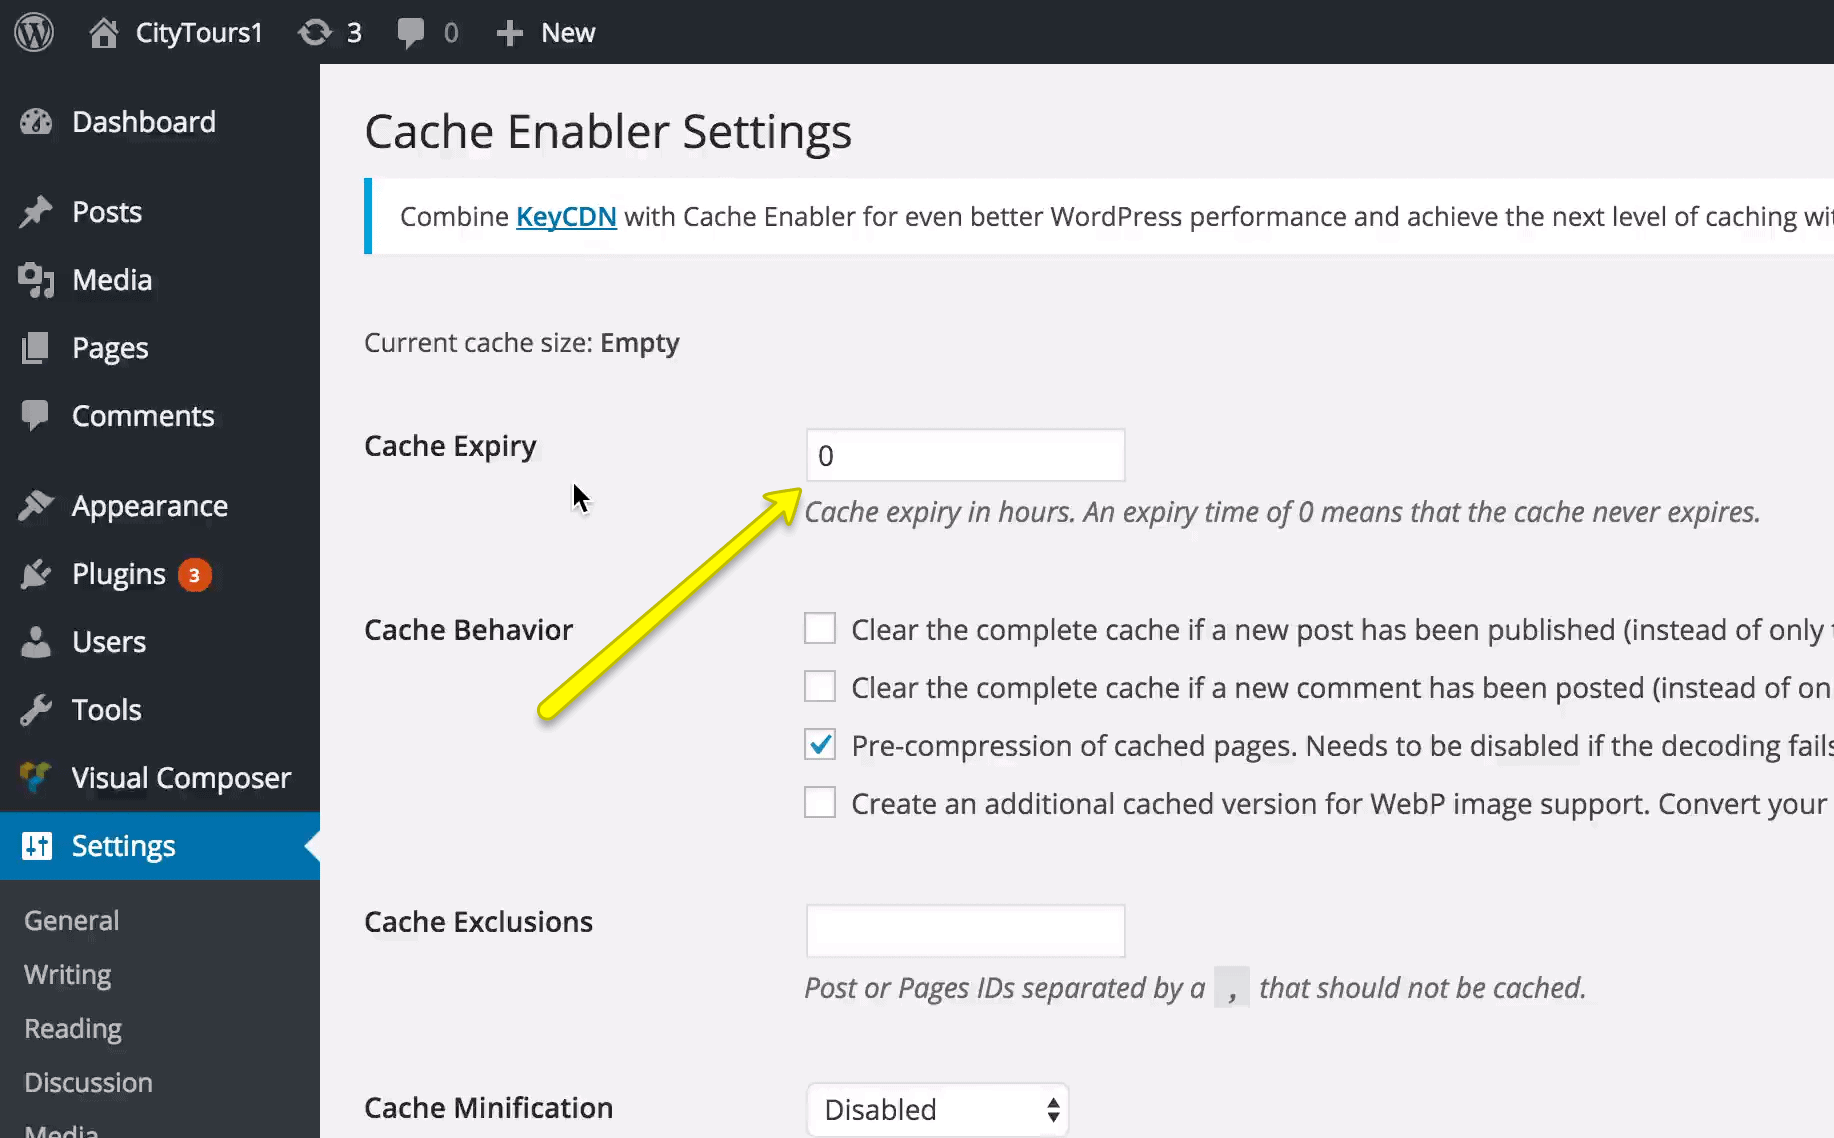
The first option on the plugin’s settings page is Cache Expiry. It allows you to automatically clear your cache in predetermined time intervals. You just need to type in your value (in hours) and make sure to hit the Save Changes button. If you keep the 0 value, cache won’t expire automatically. By the way, every time you hit the Save Changes button, your cache clears up.
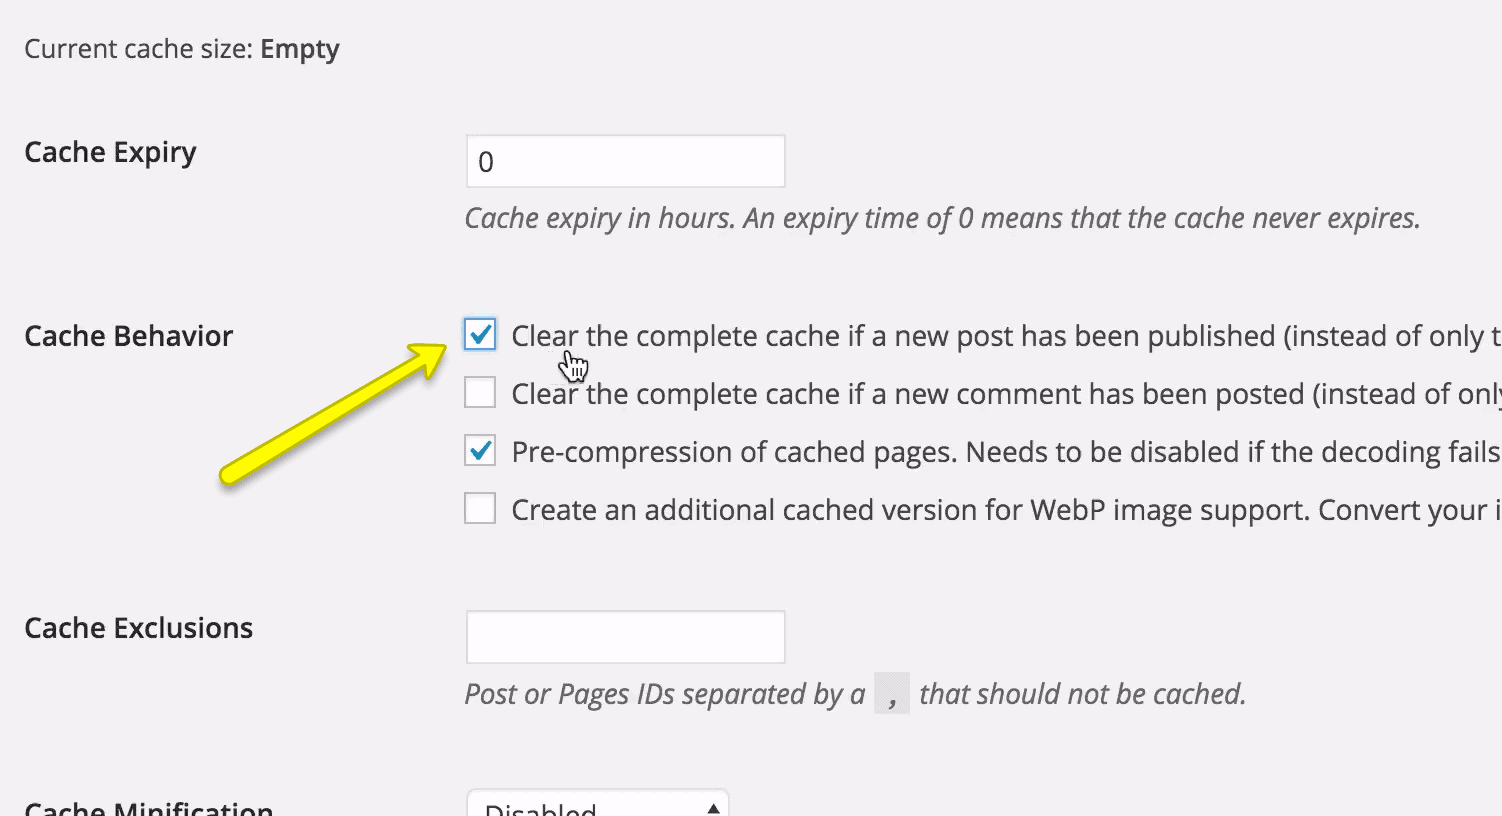
Clearing Complete Cache When Post is Published
The default functionality is to clear just the homepage page every time a post is published on your WordPress blog. In case you want to clear complete cache every time you publish a post, you need to tick the first checkbox in the Cache Behavior section of the plugin. It’s called “Clear the complete cache if a new post has been published (instead of only the home page cache).”
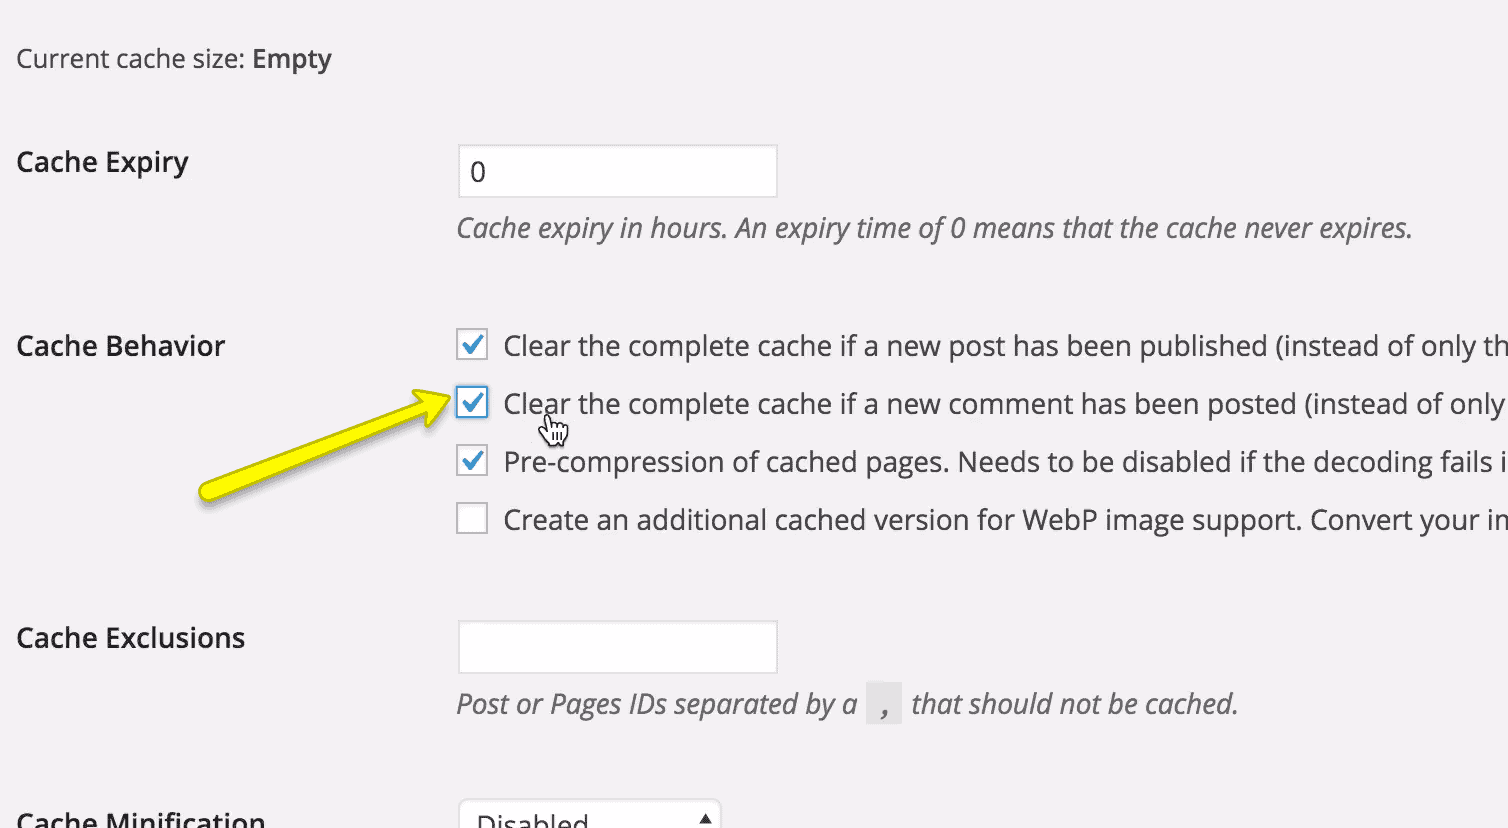
Clearing Complete Cache When Somebody Comments
You can also clear complete cache if somebody leaves a comment on your site, In order to enable that functionality, you need to tick the second checkbox in the Cache Behavior section of the plugin. You also have the option to manually clear complete cache by clicking the Clear Cache link in the upper-right corner of your WordPress dashboard.
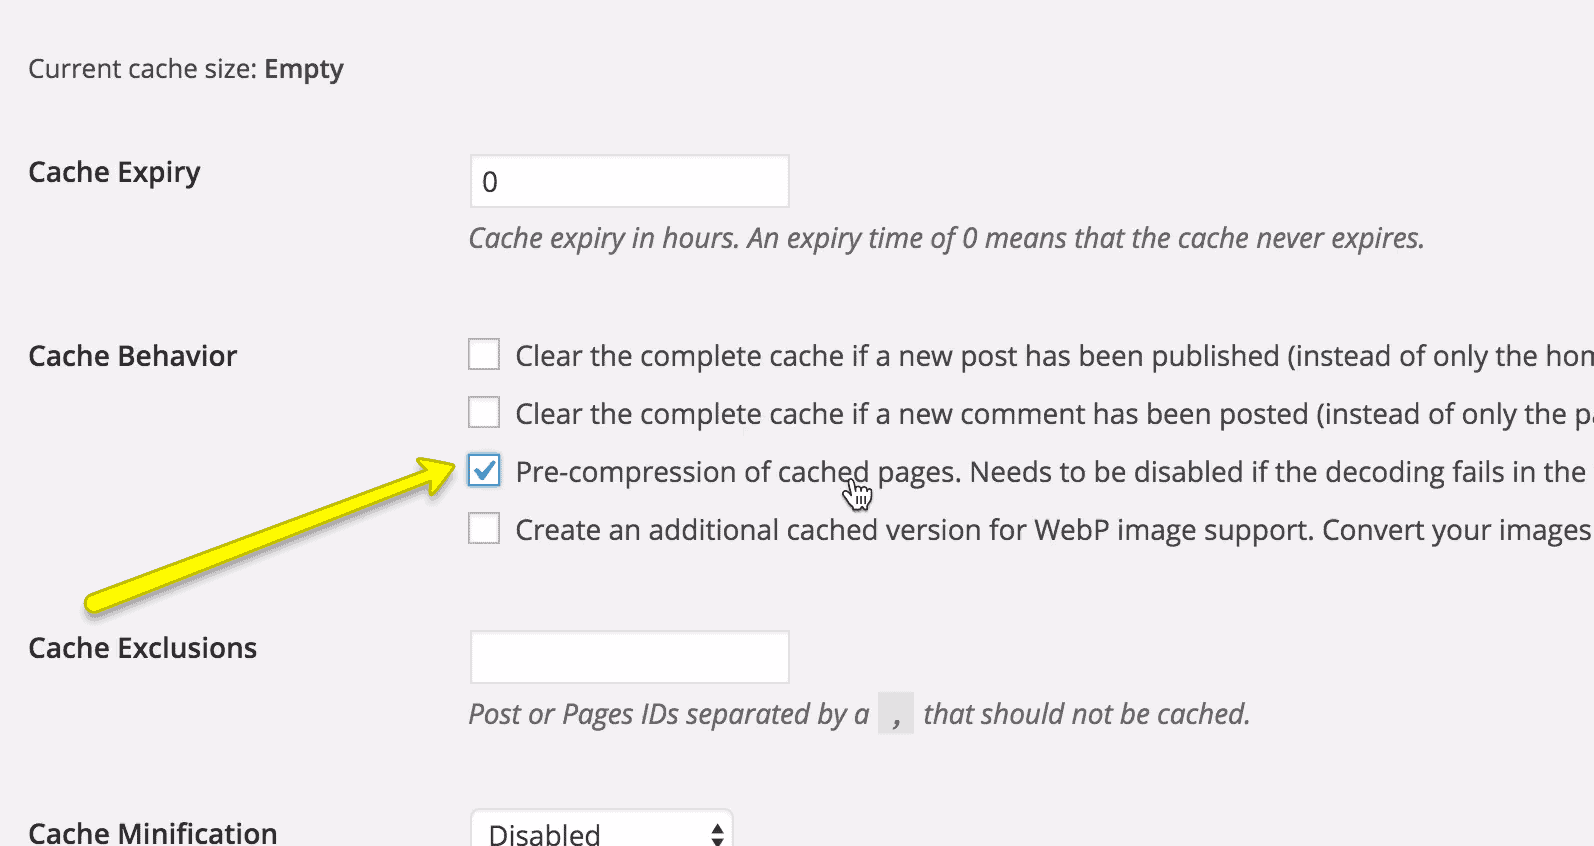
gZip and WebP
If you’re OK with using gZip for caching your site, you want to keep the third checkbox in the Cache Behavior section of the plugin ticked. In case you also want to convert images to WebP, you need to use the Cache Enabler plugin in conjunction with the Optimus Image Optimizer Plugin and enable the WebP options on both plugins.
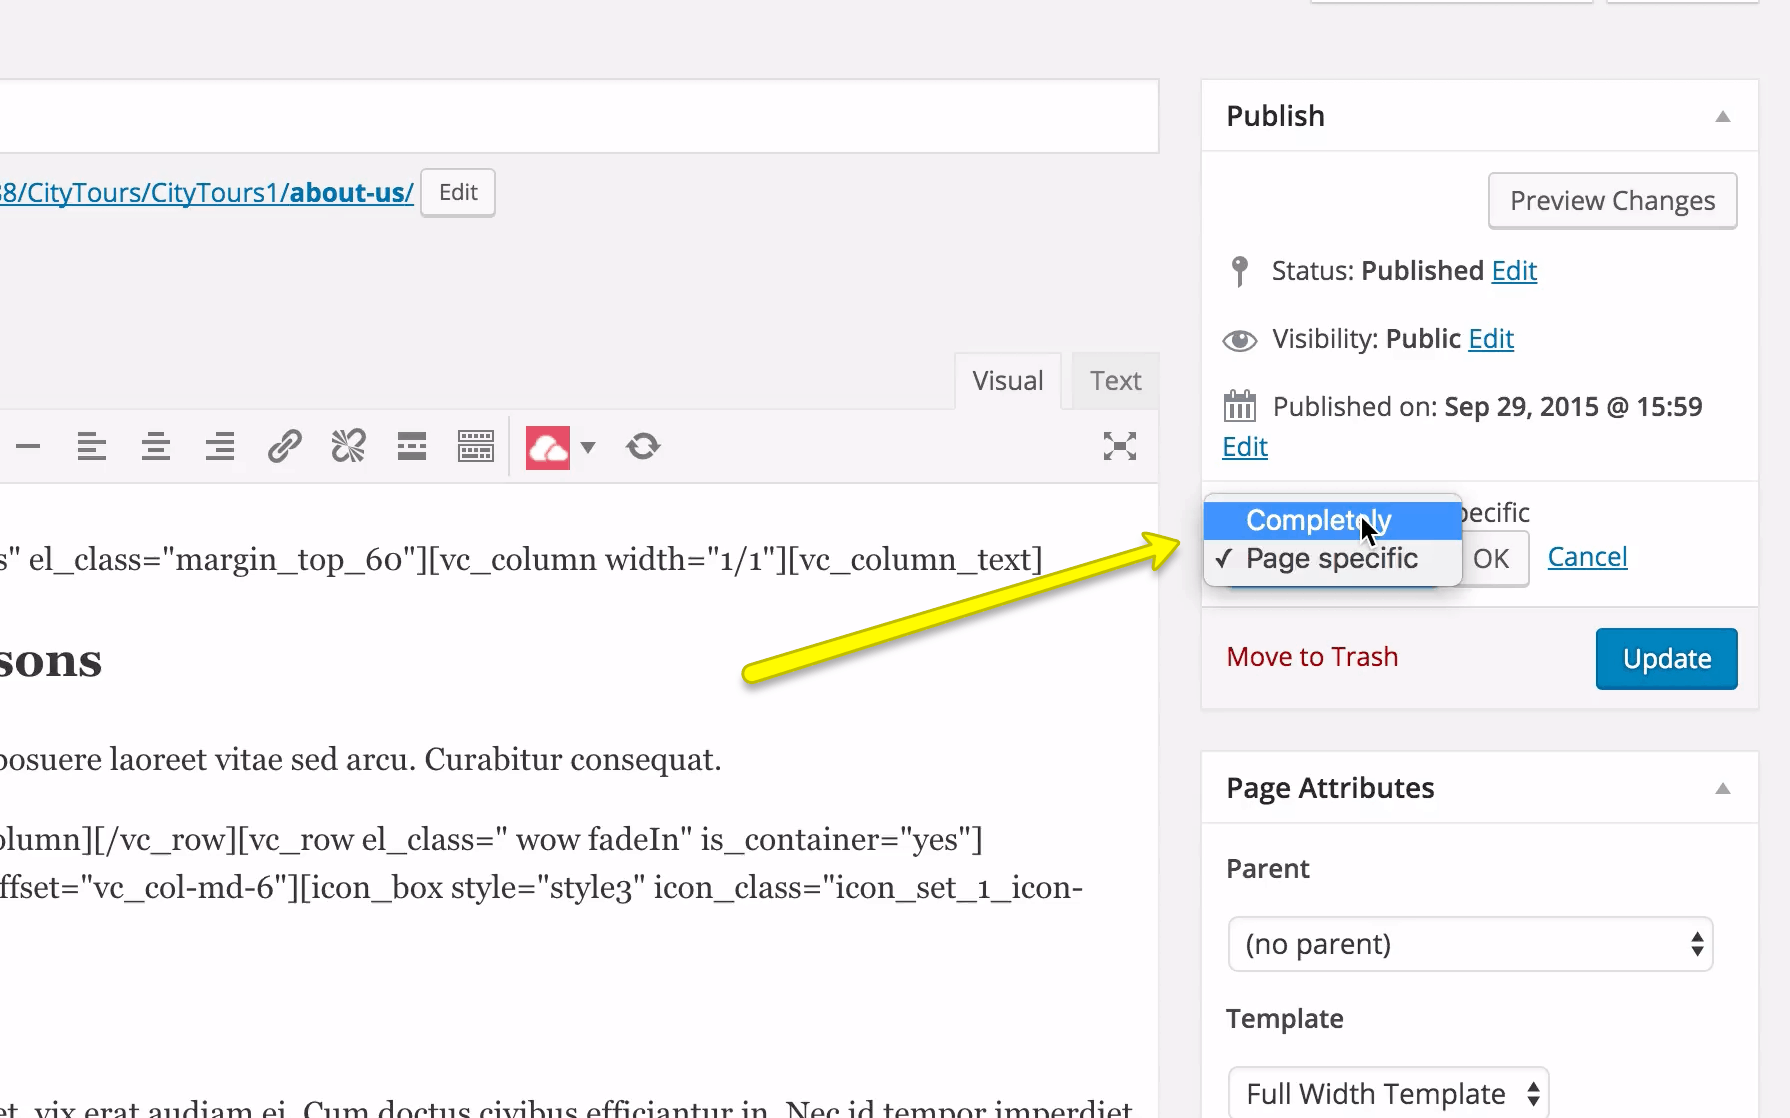
Clearing Cache upon Updates
The Cache Enabler plugin also allows you to handle your cache right in your page editor. You just need to click the Edit link and choose whether you want to clear page specific or complete cache once you update your post or page. Once you’ve made up your mind, you just need to hit the OK button.
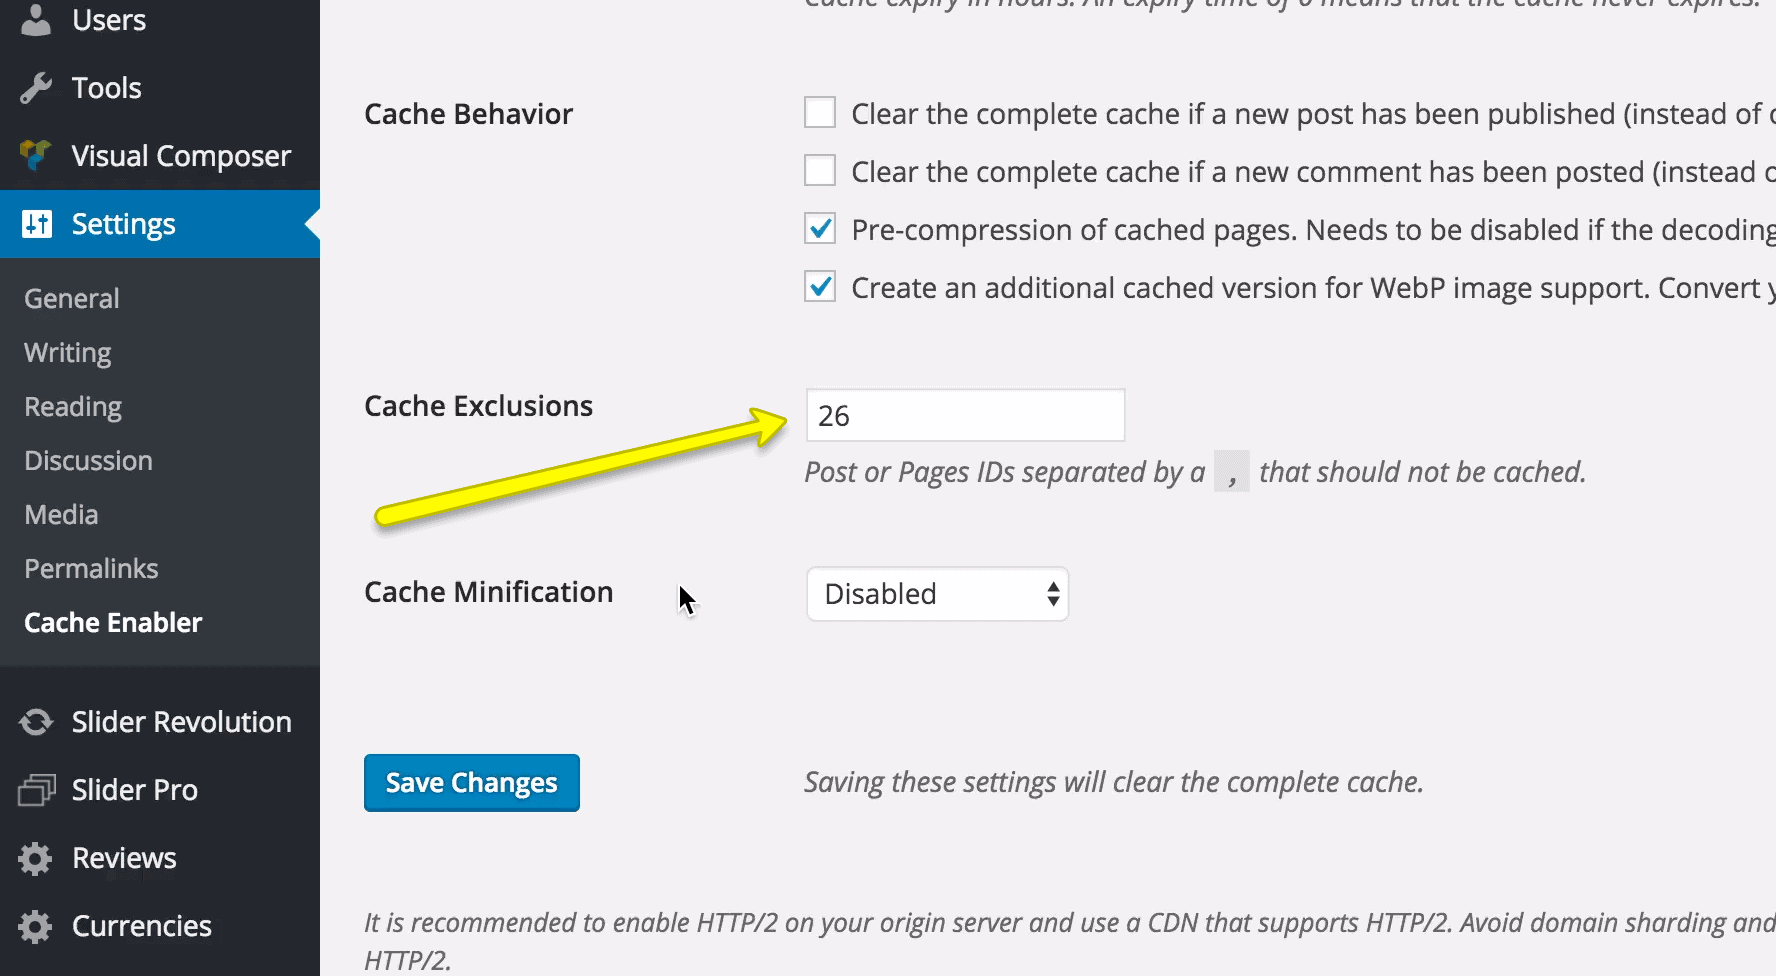
Cache Exclusions
In case you don’t want to allow caching for certain posts or pages, you can use the Cache Exclusions text field. You just need to enter your post or page IDs to prevent those items from being cached. You can find your post or page ID by looking at the value of the post variable in the URL while in your editor. Once found, just type it in the Cache Exclusions text field.
Cache Minification
In a nutshell, cache minification is the removal of unnecessary stuff – chunks of HTML or inline JavaScript code – from your cache. Thus, the goal of minification is to make source code “smaller” in order to improve performance. The Cache Minification drop down gives you the option to disable minification, enable it for just HTML or enable it both for HTML and Inline JS.
Bottom Line
The main benefit of the plugin is that it’s lightweight but nonetheless has all the features you need in a cache plugin. As you were able to see for yourself, you can easily install it and get started with using all its features before long. The plugin is bound to become the next mandatory or default caching WordPress plugin.
What’s your favorite WordPress cache plugin as of now?