This post is going to explain how to optimize images before you upload them to your WordPress dashboard and what you’re supposed to do after that. You may be tempted to just click the Add Media button in your WordPress and use your images as is. It’s a total no-no guys.
By the way, if you’re interested in product photography in Ireland, Product Shots has the first Styleshoots machine in Ireland and services to meet your needs.
Problem is, doing so may cause pretty severe issues both for your site’s general performance and search engine optimization rankings also known as SEO rankings. You’ll be able to use the tips that you’ll learn now so that your site looks awesome, loads fast and sends all possible hints to Google so that it knows what’s actually depicted on your image.
Video on How to Optimize Images
If you don’t feel like reading, here’s the video that covers the same.
Google’s Image Disability
Though the guys at Google do all sorts of super clever things that are next to magic for most of us, they are still not able to make Google (at least at the time of the writing) to figure out what exactly is depicted on your image. That being said, you have a few ways of actually letting Google know what your image is all about. Here’s what you can do to “fix” Google’s image blindness.
Alt Image Attribute
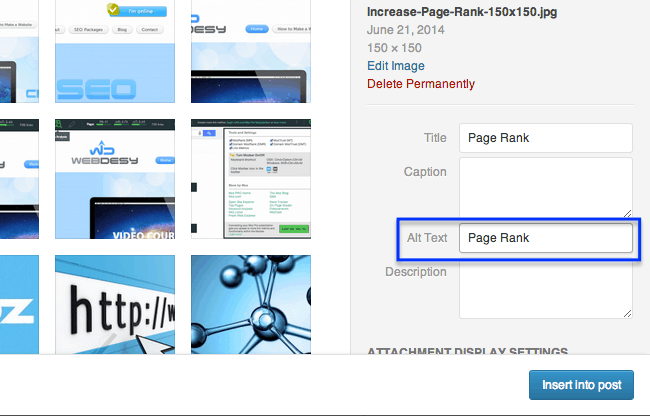
The first and foremost way of giving Google an idea what is on your image is to use a descriptive alt attribute. It’s also referred to as image alt tag, but it’s actually an attribute. So, once you upload your image and add it to your post, be sure to give it a keyword-rich alt value. It means your alt value should both contain your keyword and describe the image itself. That would be ideal.

For example, you add an image with a funny cat. You totally need to use something like ‘funny cat’ or something along those lines in your image alt attribute.
Image File Name
If you just bought an image and you’re ready to upload it to your WordPress, hold your horses 🙂 You better rename it so that your image file name contains the keyword you want to optimize your page for.

You can just open your image in Finder (or Explorer if you’re on Windows), click your image file name twice (not double-click but specifically click twice). Once you can edit, just rename your image to something that contains your keyword. Also, be sure to use dashes to separate words. Using underscores in file names can cause issues when it comes to SEO.
It also makes sense to change your image file name for image search results. Thing is, Google tends not to show the same images in search results. If you use an image that is already indexed and ranked in Google, renaming it gives you more chances that your image will rank high as well. As a matter of fact, it’s best practice to use both unique image names and images themselves, but it requires a certain budget or time. That’s because you’ll need to either hire someone who will design images for you, buy images or just learn to create them on your own.
Image Size and Dimensions
If you do use your image as is, chances are, you’ll use either an image of too low or too high quality which is a really bad idea in either case. Be sure to always use the image size you ACTUALLY need.
If your image is of too low quality, it’ll get pixelated when enlarged.
![]()
In case your image is of too high quality, it’ll drastically slow down your site. Plus your site visitors won’t see all the beauty of your image you’re trying to show because most monitors just won’t show more than 72 dpi (dots per inch). Unless it’s a retina monitor. Speaking of which…
If you want to make sure that your site is displayed properly on retina monitors, you may want to install the WP Retina 2x plugin on your WordPress. This plugin creates retina-ready images automatically. With that in mind, you’ll still need to resize images manually. Here’s how you can go about it.
Adjusting Images with WordPress
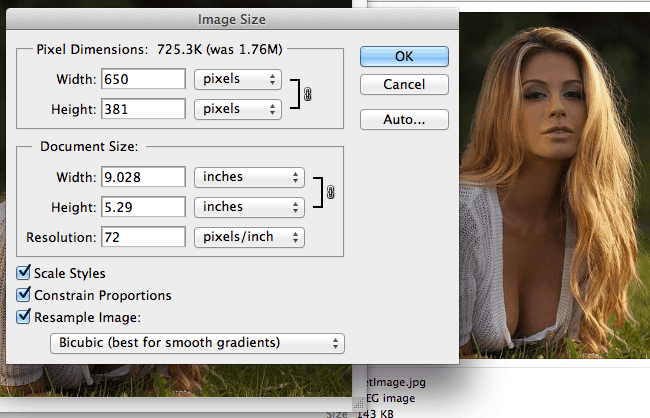
You can edit your image dimensions right in your WordPress dashboard. Just login to your admin panel, now go to Media and then select Add New. Now select your image. Once your image has been uploaded just click Edit and then click the Scale Image option. That will open a window that allows you to proportionally resize your image.

Once you’re happy, click the Scale button. And finally click the update button. You should be able to see your new file dimensions in the Save block.
Note: resizing image right in your WordPress dashboard is a cool feature, but you actually want to resize your images before you upload them to your WordPress. Otherwise you’ll clutter up your database like crazy.
Adjusting Images with Photoshop
Like I said above, you can resize your images with Photoshop which allows you to both get the dimension you need and keep your WordPress database uncluttered. Let me show you how.

Just open your image with Photoshop. Expand the Image drop-down menu and select Image Size. Make sure that the Constrain Proportions checkbox is ticked. That option makes it possible to rescale your image proportionally. Now specify the needed width and the height of the image will adjust automatically. That done, click OK. Now you just need to save your image for the web. Expand the File drop-down menu and select Save for Web. Which brings us to another aspect to keep in mind while working with images.
Image File Formats
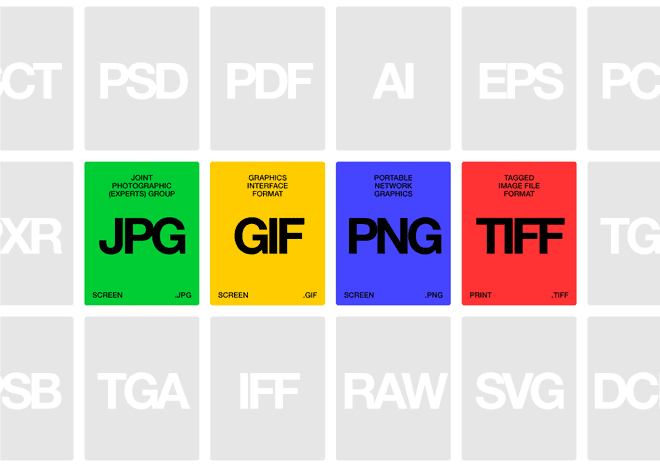
You need to save your image in the most optimal format. Your image should both look decent enough and not take up too much size. There are three main image formats out there, such as .gif, .jpeg and .png .
.GIF
You want to use the .GIF file format for logos and other graphics with solid color areas. What’s more, the image file format also supports simple transparency. At the same time, it’s not a good format for images with lots of details, like photos, gradients and stuff like that.
.JPEG
The .JPEG (also known as .JPG) image format allows you to store a deluge of colors. Plus the file size of your image stays pretty lightweight. On the dark side, the image file format does not support transparency and it’s a lossy format. That means every time you edit the image in Photoshop and save it, your image loses quality every time you save it – quite drastically!
.PNG
And if you’re Ok with your .GIF image, but it’s just missing some features, you most likely should go for .PNG because it also supports transparency (more advanced that .GIF though) and it’s a lossless file format (unlike .JPEG), which means that it won’t lose quality if you edit and save it for a few times. Being lossless, your .PNG images will be heavier that .JPEG ones.

Image credit: underwaterpistol.com
Specific Width and Height
Thing is, if you explicitly define the width and height of your images, the browser saves that spot for your image before it actually loads the image. If you don’t define the width and height for your image, the browser has to spend extra time and efforts to figure out what area a specific image will need. That slows down your site speed and consequently negatively influences your SEO rankings. So, in case you inserted an image that is too big, don’t just delete the height attribute, hoping that browsers will somehow figure out what height your image should have. They surely do, but it’ll make your site by a long shot slower. And it’s totally not worth it.
Descriptive Text
Adding descriptive text to your images is another way of telling Google what is on your image. Every time you add an image to your WordPress, there’s a way to specify some descriptive text for it.
You can just go to Media > Library and click the name of the image you’d like to add or edit description for. Just type it in the Description area. What’s more, you can do that right while adding an image to your blog post. You should have this option on the right hand of your WordPress Media Library.
Go to your post. Hit the Add Media button. Select your image and see the ATTACHMENT DETAILS section for the Description option. That’s exactly where you can add or edit it.
And the list thing to consider….
Keyword Proximity
You also want to use your keyword before your image and after. It’ll give Google another hint and proof that your image is exactly what you’re trying to prove it is. As a matter of fact, it happens pretty naturally for the most part, but you still may need to check that from time to time.
Useful Links:
How to Make Your Site Insanely Fast
Test your mobile speed.
Alt Text for SEO: How to Optimize Your Images
Conclusion
Since the Web is becoming even more visual, it’s totally crucial to make sure that you know your stuff when it comes to treating images that you use on your site. Now you know how to properly use images in your WordPress so that it gains you both awesome site performance and SEO benefits.
Got more tips related to image optimization? Please feel free to leave them and your questions in the comments.


