In our day and age, it’s really hard to exaggerate the importance of optimized images because image size influences your site performance, user experience and last but not least SEO keyword rankings. That’s exactly where Optimus Image Optimizer comes into play. It’s a neat WordPress plugin from Optimus.io that optimizes your images both efficiently and securely.
What is Optimus Image Optimizer All About?
The Optimus Image Optimizer plugin allows you to reduce the file size of uploaded media files. Depending on the image and format, you can reduce your image size up to 70% without losing image quality. With that in mind, you need to remember that every saved kilobyte contributes positively to the overall performance of your website.

Video Review of Optimus Image Optimizer
In case you prefer videos and don’t really feel like reading, you can also quickly get to know what the Optimus Image Optimizer plugin is all about by watching the short video beneath.
Versions
There are three different versions of Optimus:
- Optimus as a base free version with limitations (for example, the maximum image file size of 100kb)
- Optimus HQ with expanded functionality. You can use this premium version for personal projects only
- And Optimus HQ PRO as a professional premium solution for customer websites
Now that you know why exactly you want to use the WordPress plugin, let’s see how you can install and configure it.
Installation
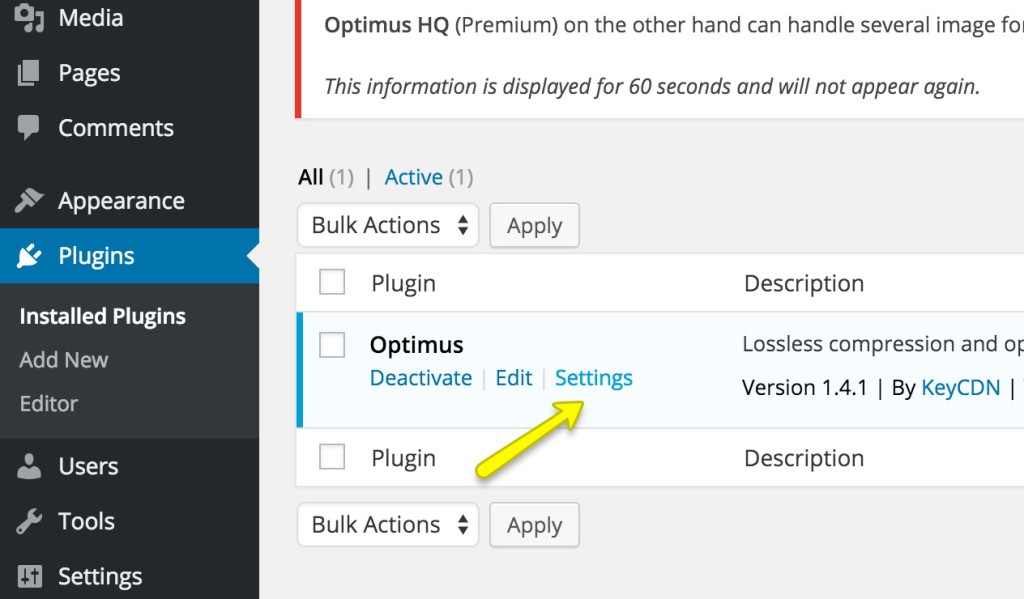
You can easily install the plugin by going to Add New under Plugins in your WordPress dashboard. Now that you’re in the Add Plugins section, you can just use the Search Plugins feature to search for Optimus Image Optimizer. Once found, click Instal Now and activate your plugin. In order to configure your brand new plugin, click the Settings link under Optimus.
How the WordPress Plugin Works
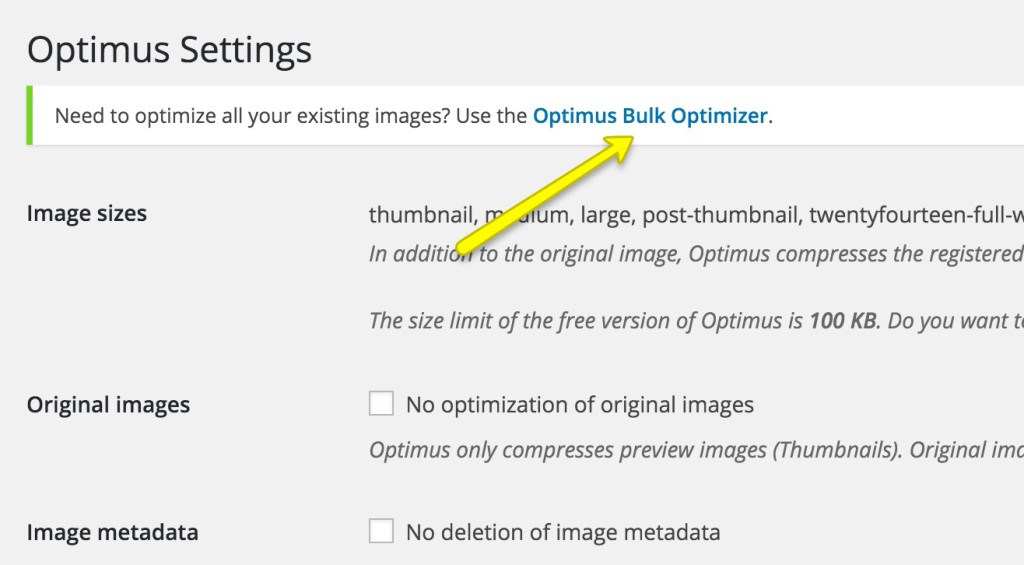
Now that you’ve installed your copy of Optimus Image Optimizer, it will automatically optimize all the images that you upload and use on your WordPress site. What about all the images that you used on your site before installing the plugin? Luckily, you can also optimize them all at once by clicking Optimus Bulk Optimizer across the top of your Optimus Settings page. Also, you can access the same feature if you go to Tools -> Optimize all images.
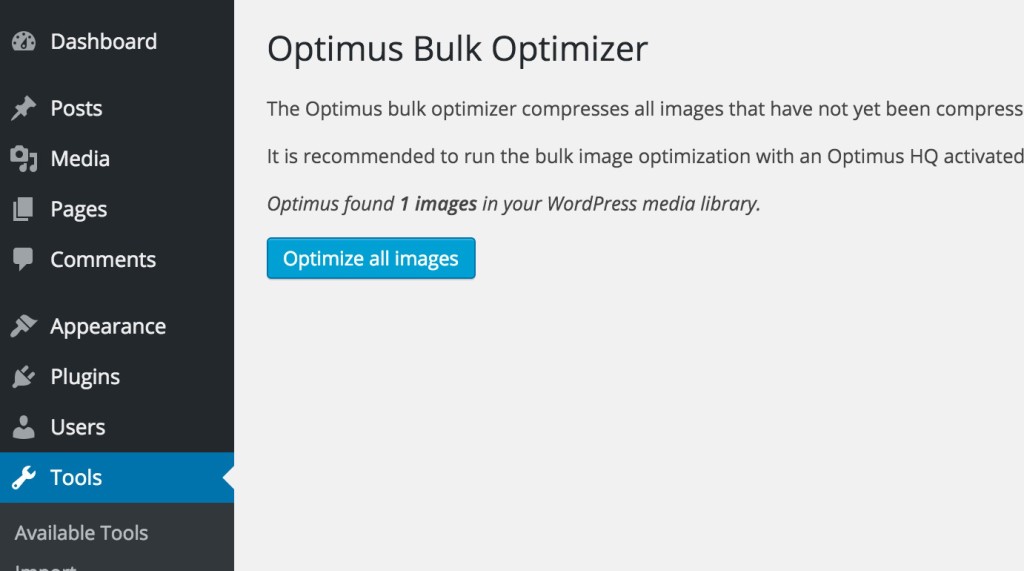
Optimize All Images
This section allows you to compress all the images that have not yet been compressed in your WordPress media library. You just need to click the Optimize all images button to get the optimization process started. Depending on the size of your images, it can take a while till all your images get optimized.
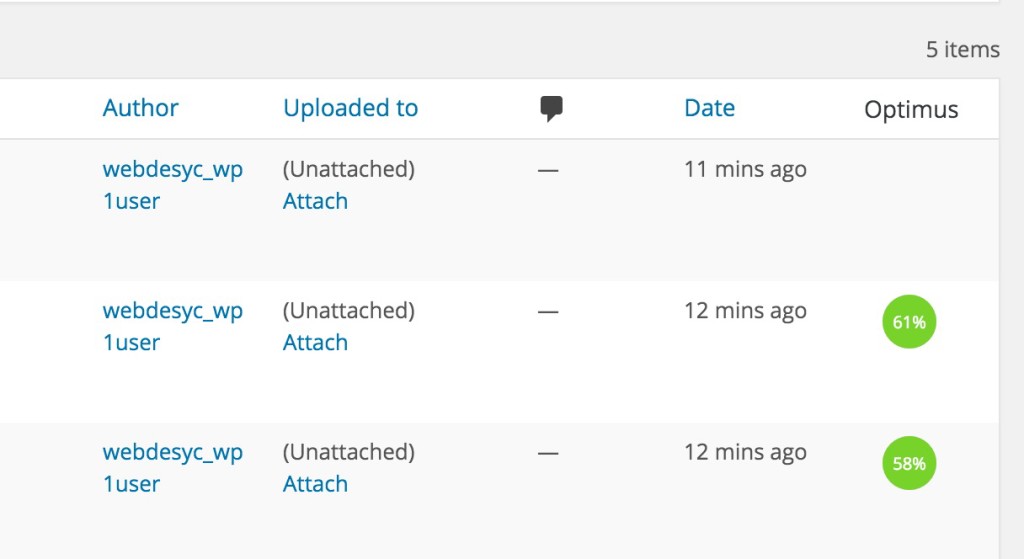
Green Circles
Now you can go to your Media library – make sure that it’s set to list view – and check the Optimus column for green circles. There is one circle per file. If a circle is missing, the file size was not reduced. If the circle is filled out completely in green, that means all thumbnails as well as the original image have been successfully optimized. If your circle is partially green, not all versions of the image were optimized.
Configuration
Now let’s take a look at what settings you can configure in the plugin. Though the plugin works out of the box, you still may want to tweak a thing or two.
No Optimization of Original Images
If you don’t want to have your original images optimized, you can go to Optimus under Settings and tick the No optimization of original images checkbox. You’ll want to do this only if you know what you’re doing because your non-optimized images will eventually pile up on the server without being actually used.

No Deletion of Image Metadata
If you want to keep your image metadata, you just need to tick the No deletion of image metadata checkbox. Among other reasons, you want to keep the data so that search engines can make use of EXIF because this format has standard tags for location information (geotags) which may be beneficial for local SEO. If you’d like to learn more about EXIF, check out the videos below:
About EXIF
EXIF for SEO
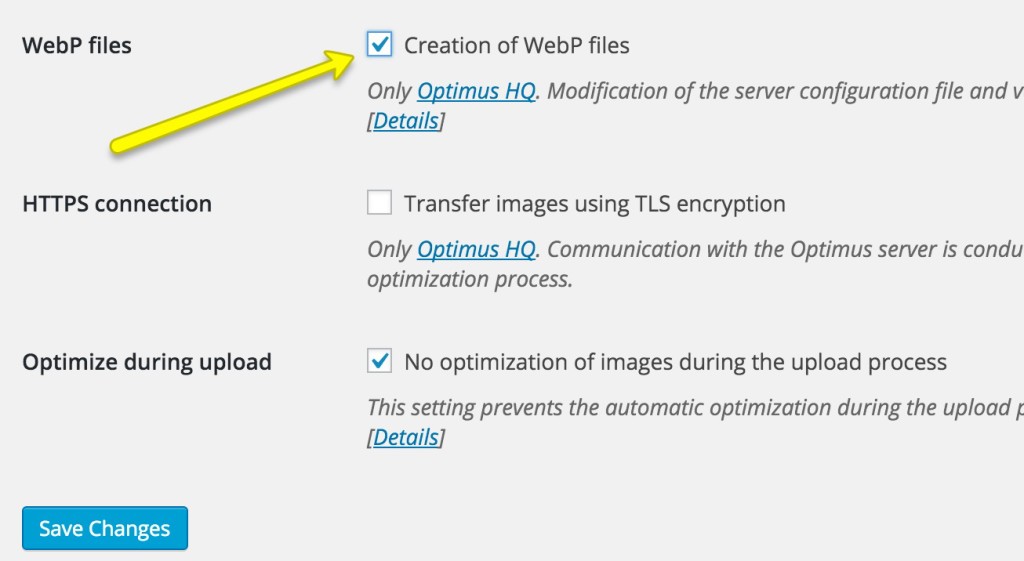
Creation of WebP files
In case you also want to use WebP images, you can tick the Creation of WebP files checkbox. As doing so will slow down the optimization process, it makes sense to enable the feature only if you’re actively using the WebP image file format. Otherwise it’s just downright overkill to switch it on just for the sake of it. Configure responsibly!
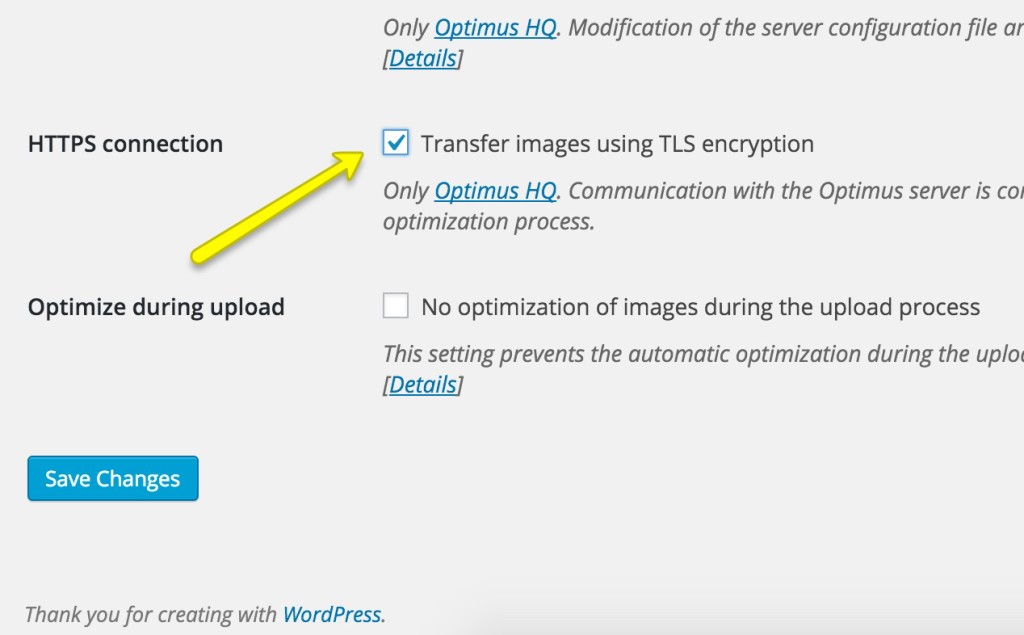
HTTPS Connection
If you also want to make sure that your images are safely transferred back and forth, you may want to enable the HTTPS connection feature. Just keep in mind that using it will also slow down the optimization process.
No Optimization of Images During Upload Process
The Optimus Image Optimizer WordPress plugin automatically optimizes your images during the upload process by default. Should you want to disable the functionality, you need to tick the checkbox that is conveniently entitled No optimization of images during the upload process. This allows you to quickly upload unoptimized images to your server if you are in a rush.
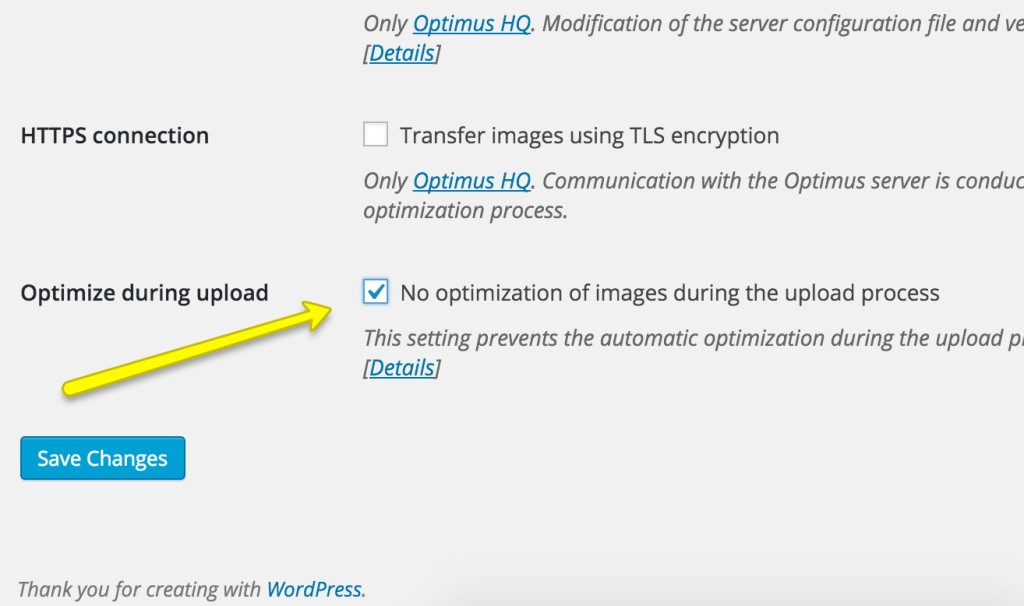
You can always go back later and optimize these images when you have more time
Bottom line
The Optimus Image Optimizer WordPress plugin makes it possible to effortlessly and effectively optimize your images, which guarantees tons of benefits both for your users and for the search engines out there. You want to keep the highest level of image compression without jeopardizing image quality.
How do you regularly optimize images for your site?