WordPress is a fantastic resource and probably the best content management system (CMS) for creating websites out there. This is of course partially thanks to the ease of use the CMS brings to the table and also the fantastic array of plug-ins. WordPress-based sites allow you so much control over what you add, when you add it and how your site looks and performs. Of course, getting your website right and optimizing it for your viewers’ user experience is one of the biggest battles out there. A site may look aesthetically great, however ensuring it’s working to the best of its ability takes more than just a hunch.
Fortunately, if you own a WordPress-based site you can use A/B split testing in conjunction with Google’s Analytics to ensure it’s at its best.
What is A/B Testing?
Well, A/B split testing is essentially a way of experimenting with two variations of a page or site (‘Page A’ and ‘Page B’) to see which works best.
Though Google does tend to have its issues with duplicate content – A/B split testing tends to be an exception. Google has no problem with performing these tests with the same content in a different layout for the sake of traffic experimentation.
Why You Should Test?
The great thing about performing an A/B test is that it’s extremely easy to do and a lot faster than comparing two sites manually. Instead of amending a page’s layout and content and testing each version one-by-one, A/B testing allows you to do it at the same time. It’s easy to see the volume of traffic that’s being directed to the website and you get reports back showcasing each page’s performance at the same time. So, you can see which page is working well and pinpoint which page’s days are numbered.
The layout of a page has a noteworthy impact on the attainment of the page. Even if the content is the same, any web developer worth his salt will tell you that the layout of the page still has a significant impact on the popularity of the page, the success on-site actions of the visitor and overall conversion rates.
Benefits
Split testing has a number of benefits:
· Makes it easy to narrow down the most successful test webpage. This involves small changes which can increase everything from Newsletter signups to turning potential customers into real customers.
· The person (customer) who uses the sites chooses their favourite website ensuring you hit your audience. One piece of work we did for one car leasing company involved a one- and a two-button layout. The former was our idea and the two-button layout was the company’s – the single layout was far more successful in split testing and therefore was implemented. Without split-testing, there would be no way to convince the customer to use our layout idea.
· Improvements are continually made and your staff is constantly designing to refine based on real life information. New ideas can be tried out regularly and not intermittently like with old forms of marketing. Split testing is a slow steady process. However, it is a proven success for increasing calls, downloads of products and general performance.
In fact, split testing generally only involves incremental changes, which are tweaked without any notice. Tweaks to a web page are so small because all changes are essentially only options and not visible to the end user.
Empirical Evidence
Theories based on empirical evidence and user testing are usually right. However, it is common for them to result in only minuscule differences in the conversion rate of your website as they are only applicable to a small number of site users. Sometimes split testing can even be a failure and result in decreases in conversion rates. No panic! It does not really happen that often.
How to Make it Happen
This all sounds great: so, how’s it achieved?
· Hypothesis Preparation – Insights from experiences, analytics and user testing are seen as the foundation of test websites
· These varying sites are created according to test results
· Testing different webpages on users at the same time to see which are more successful
· Outcomes are reported upon once apt data has been gathered
How to Perform A/B Testing on a WordPress Site
The first step we perform at Fusewave when performing A/B testing on a WordPress site involves you setting up a Google Analytics account. This free resource allows you to monitor the levels of traffic to your site to determine a range of different information. Analytics allows you to see how many people visited your site, where they came from, how they reached your page and how long they stayed as well as a raft of other stats.
You now need to set up your Google Analytics on your site and this involves copying and pasting some tracking code from Google’s Analytics and placing it on your site. This tracking code can be added in a few different ways:
- In the footer.php file
- Into the theme on your WordPress site
- Using a specific Google Analytics Plugin
The Experiment
Now, you will need to set up an A/B split testing experiment in your Google Analytics account. That’s totally easy to do. Well, it’s not rocket science for sure.
To make things even easier, you can just watch the video.
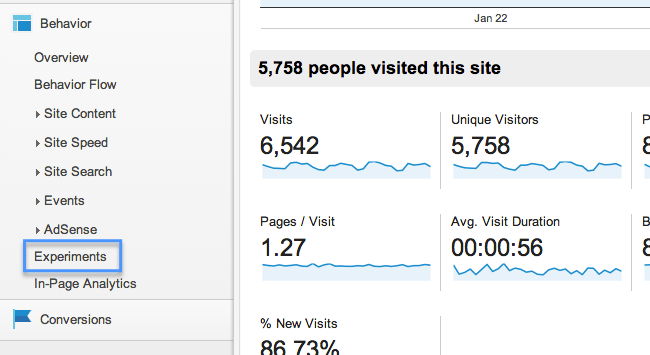
To get the ball rolling, you need to go to your Google Analytics account, select your site from the list, expand the Behavior drop-down menu and select the Experiments option.
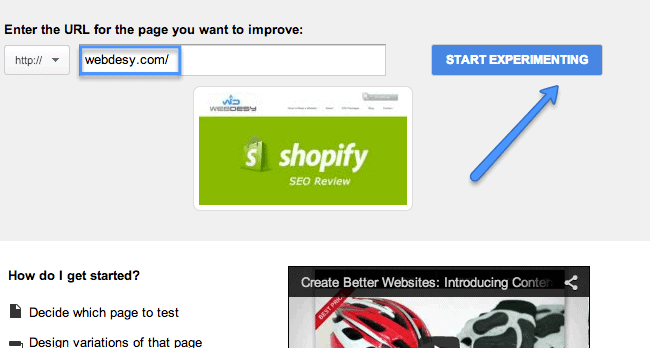
Now you need to enter the URL of the page you want to improve and click the blue Start Experimenting button.
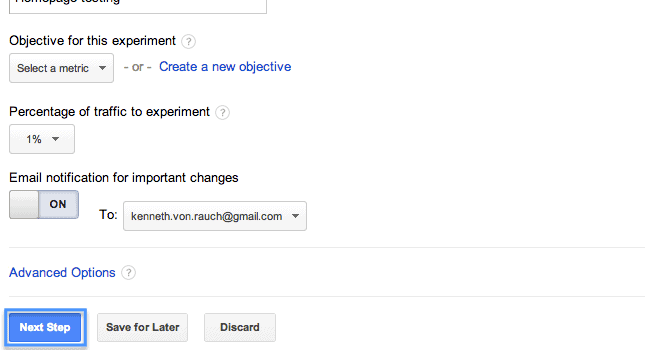
Enter the name of your experiment.
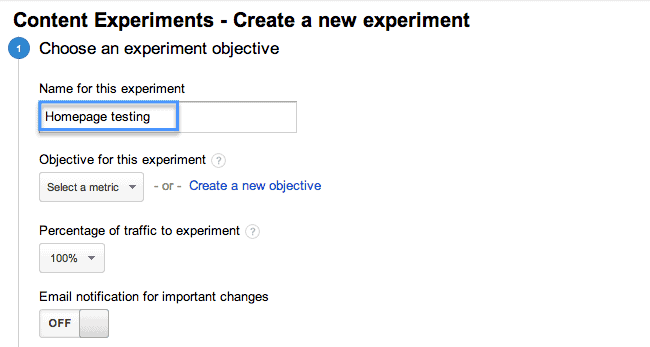
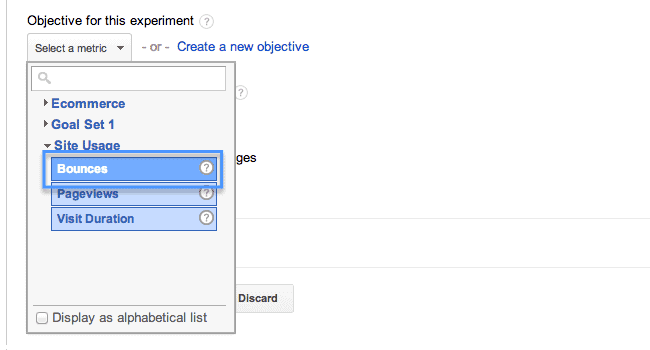
Choose your objective for the experiment. For example, bounces. The winner page should get the fewest amount of bounces.
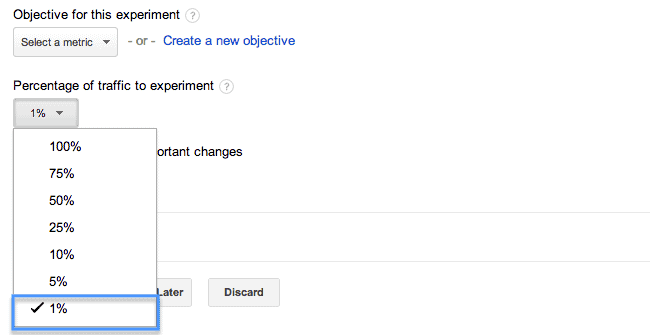
Specify the percentage of your site visitors that should be used for this experiment.
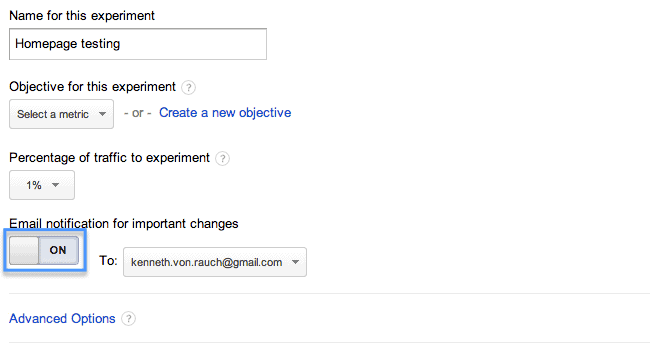
In case you really want to keep track of any important change in your experiment, turn on the Email notification for important changes option.
Click Next Step.
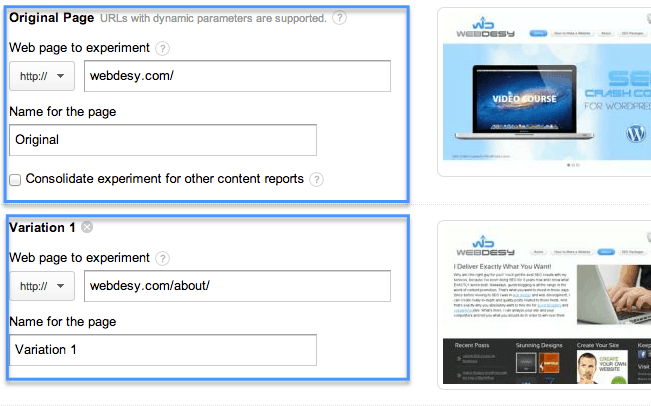
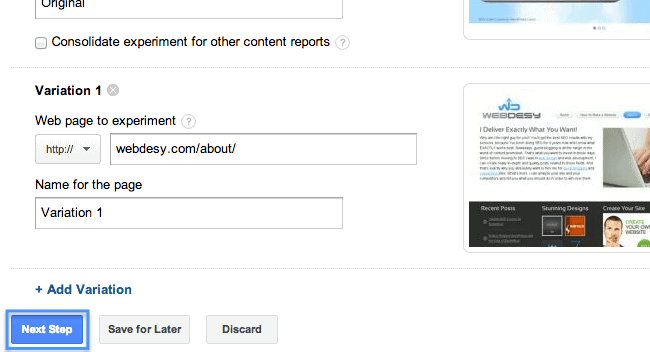
Now you can add your variations that you want to test against.
Click Next Step again.
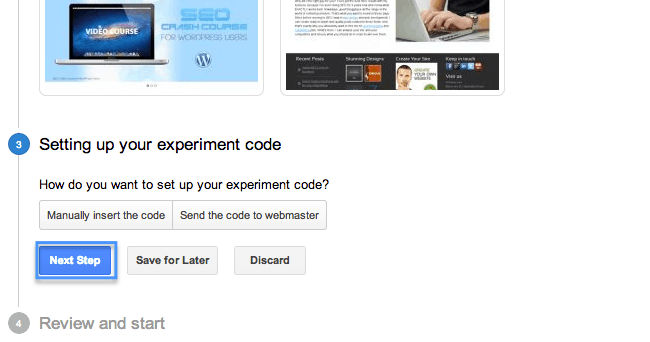
Now you can preview the pages that you’re about to run your experiment on and select the way you want to go about inserting your code. You can either manually insert your code or just email it to your webmaster so that he or she does it.
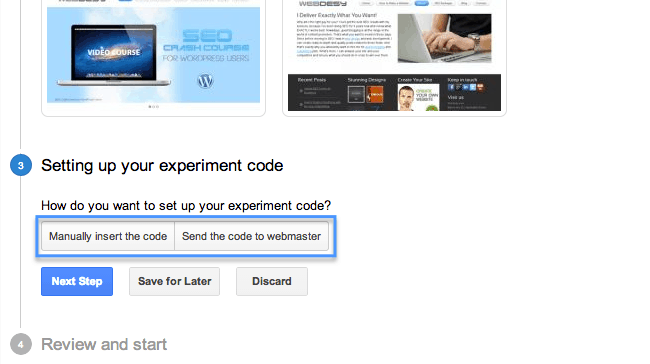
That done, click Next Step.
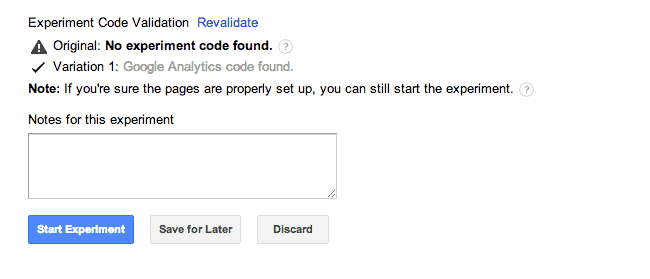
If your code was detected, you can just click the Start Experiment button to get the party started.
