This week another dose of my super cool must have WordPress plugins stuff. In this episode (damn, it sounds like I’m talking about Star Wars or something :)) I’m gonna talk about Widget Logic, WordPress Editorial Calendar, and WordPress SEO by Yoast. Unfortunately, I’m not going to touch on topics like Princess Leia, but those plugins are pretty hot things as well. They’ll help to simplify your life as a WordPress site administrator.
Widget Logic
Did you ever want to show a certain plugin on one page or post but not on the other? Guess what? Now you can! You just need to install the Widget Logic plugin. Widget Logic lets you control on which pages widgets show up. You can use WP’s conditional tags for that. So first off, go ahead and install it. Not sure how to do that? Here you go:
- Go to your WordPress admin panel;
- Roll over the Plugins option and select Add New;
- Now, insert or just type in Widget Login in the search text field and click Search Plugins. At this point, you should see the plugin you’re searching for on the first place in the list;
- Click on Install Now;
- And voila. it’s been installed.
Now I offer you to check out my video, which explains how this thing works.
WordPress Editorial Calendar
Have your ever had the problem that you have a few posts scheduled ahead, but you’re not sure which day they’re going to get published on and you need to double-check it all the time? I personally had such a situation lots of times. But the good news is that not everybody in the WordPress community is that stupid like me 🙂 There are smart guys out there who made a really neat plugin that allows you to schedule posts ahead of time and visually see what posts are scheduled and what else still needs to be done. You’re gonna LOVE the plugin.
So, you can install it in the standard way.
Once you have your Editorial Calendar plugin installed, you need to expand the Posts tab and then select the Calendar tab. Now you should see a user friendly calendar layout with days and your posts scheduled on them.
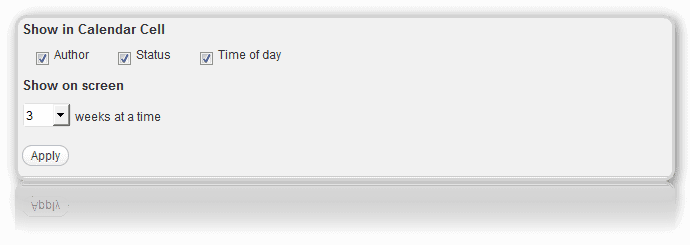
First off, let’s take a look at the options the plugin has. To do that, you’re gonna need to expand the Screen Options tab in the upper-right corner of your admin panel. You should see 3 check-boxes there with the following options:
- Author – specify if you want to have the author name displayed in the calendar;
- Status – define if you want to show the status of your posts;
- Time of day – you can specify time of the day.
Plus, you can specify how many weeks you want to have displayed on your screen.

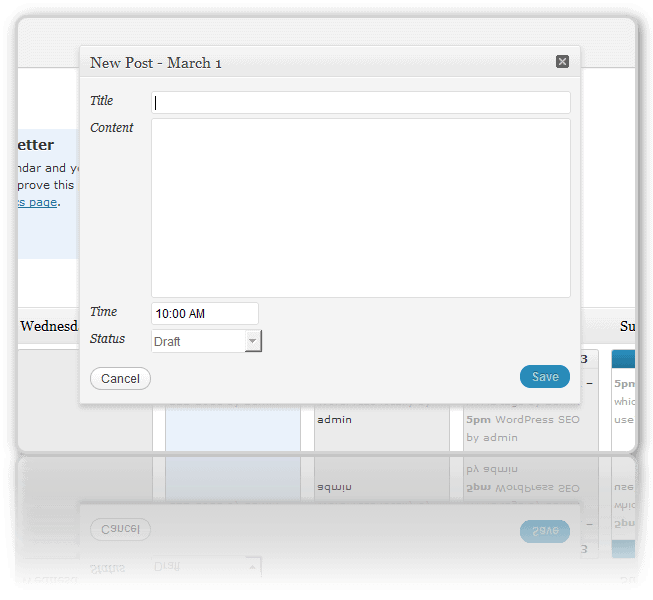
It’s actually powerful enough to allow you to create a new post right in that interface. What you need to do is roll over the day when you want to create a new post. That done, you should see the “New Post’ link. Just click on it and a new dialog window will peacefully pop-up.
In that window, you can specify your post title, content, social security number… well, the last one is not mandatory 🙂 . Apart from that, you can define your publish time and status (draft, pending review, scheduled).

And finally the awesomest feature in the plugin. If you decide that you want to have your certain post published on a different date, you can just drag and drop it on the date when you need it published. As simple as that. See it in the video down here:
WordPress SEO by Yoast
Since I’ve found a really nice video on using the plugin, I’ll just point out the most crucial features of the plugin and you’ll be able to see the rest of them in the borrowed video 🙂
Once you have the plugin installed, you can just fire up the Introduction tour option and it’ll show you around, but if you really need to understand every single thing in there, I betcha need to check this post.
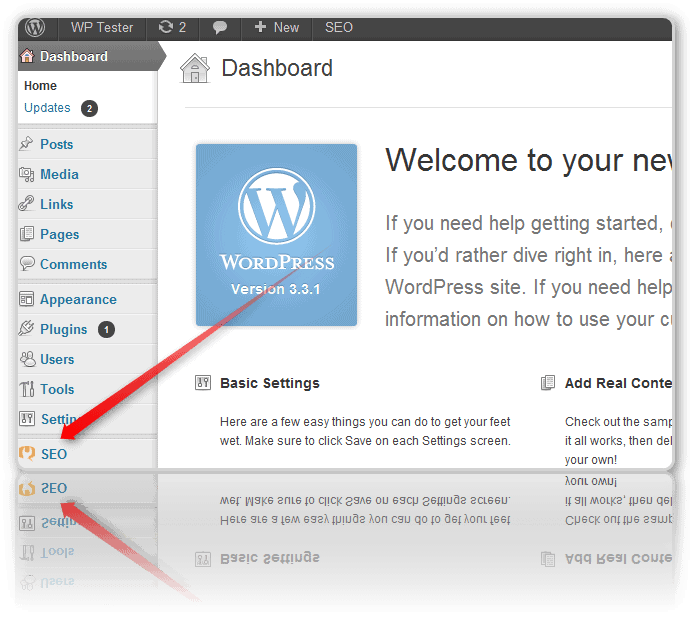
So, you’ll have a new tab in your admin panel. The tab is entitled SEO (duh!).

Now let’s quickly touch on the most interesting options you got there.
In the Dashboard tab you can set:
- if you want to use the meta keywords tag (it’s really up to you, but you don’t need it for the most part, because the big G just ignores meta keywords);
- date in snippet preview for posts – some bloggers do it, up to you;
- WebMaster tools – Google, Bing, Alexa. – to verify with the different Webmaster tools;
- Indexation – checkboxes for each of the sections of your site that you might want to disallow the search engines from indexing;
- XML sitemaps – for better indexation by search engines;
- RSS – add links back to your blog so dumb scrapers will automatically add these links too (before each post and after);
- Import & Export settings (from other plugins);
- edit files (robots.txt and .htaccess).
And a super in-depth video from Steve Wiideman
http://www.youtube.com/watch?v=MLBpmeXjse4
Since Steve did not cover the edit options of the WordPress SEO plugin, I’m gonna share some info with you. I’ll just give you a list of the options and you’ll be able to see how to use them in my video:
Edit options (while creating a post or a page):
- General:
- Focus Keyword (the keyword you want your page or post to rank for);
- SEO Title (for the snippet);
- Meta Description (for the snippet).
- Page Analysis – this section makes sure that your post complies with some minor (more or less) SEO on page factors (keyword density, amount of keywords, heading tags, outbound links availability, makes sure that your keyword appears in the first paragraph of the copy, etc)
- Advanced – it allows you to set the following parameters – Meta Robots Index, Meta Robots Follow, Meta Robots Advanced, Canonical URL, and a 301 Redirect.
And now the same stuff that I just said above, but in video format!
Do you use any of these plugins on your site, guys?


