If you’re new to WordPress (WordPress development virgin as some say) and you consider the job of a WordPress developer, you may have the question about how exactly WordPress themes work and how they are structured. In other words, you just want to get a general idea about the whole shebang. Does that sound like you? Keep on reading in that case. And one more thing actually. This post is not about how to build simplistic WordPress themes from top to bottom. The aim of the post is just to give you a general idea so that you know what you’re doing and learn more later.
You CAN’T use the post as a tutorial for creating a full-fledged WordPress theme because this tutorial only shows how to dynamically load the header, sidebar, and footer, but it does not show how to load blog posts.
What we’ll do and what you need
So, I’m just going to take a really simple HTML layout and make a simplistic WordPress theme out of it. If you’d like to follow along, you need to make sure that you have the following things handy:
- local server or access to your FTP server;
- installed WordPress;
- HTML/PHP editor;
- a cup of tea/coffee (optional).
Once everything is set up and good to go, you need to go to your folder with WordPress, open the “wp-content” folder and then go to the “themes” folder. That done, you should create a folder where you’re gonna keep your new theme. I’ll call mine “simplistic”. Well, that’s because we’re learning how to create simplistic WordPress themes here, right? 🙂
The first step in giving birth to a WordPress theme is creating your CSS file. So, you need to create a CSS file in your “simplistic” folder and call it style.css With that thing done, copy and paste the following code in your style.css file and save it:
/*
Theme Name: WebDeSimplistic
Theme URI: http://wordpress.org/extend/themes/toolbox
Author: Ken von Rauch
Author URI: http://webdesy.com
Description: A simplistic theme (very simple in other words) just for educational purposes, primarily WebDesy.com's tutorials.
Version: 0.1
License: GNU General Public License
License URI: license.txt
Tags: simplistic

This theme, like WordPress, is licensed under the GPL.
Use it to make something cool, have fun, and share what you've learned with others.
*/

/* =Structure
-------------------------------------------------------------- */
A few comments regarding the code above. You may want to change the name of your theme. I called my theme “WebDeSimplistic”. It’s up to you what you nae yours. Be creative! 🙂 Other than that, you may also change your “Description” and “Author URI” lines.
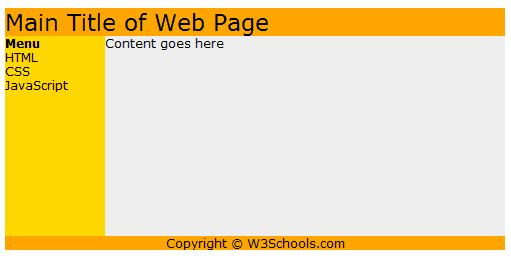
Now we need some HTML to build our WordPress theme. To make things really simple and easy, we’re going to use an HTML layout that has the same main components of just about any WordPress theme, such as the header, sidebar, content area, and footer.
We’ll just take our basic HTML layout from here . It looks as follows:
Now create a new PHP file (in your “simplistic” folder, call it index. You can just copy the following HTML snippet (piece of code if you translate that from geek speak) and paste it in your brand new index.php file (and make sure to save your changes):
Main Title of Web Page
Content goes here
Now you can just go to your WordPress admin panel, roll over the “Appearance” drop down menu and select the “Themes” option. That done, you should see a new theme in your theme collection. In my case, the new theme is called “WebDeSimplistic”. By the way, as you most likely have noticed, your theme does not have a screenshot thumbnail, but that’s Ok. It won’t harm your theme’s performance in any case. I have not included adding a screenshot in the tutorial to keep things as simple as possible.
If you click the “Active” link under your theme and refresh your browser window (F5 or Ctrl+F5 for Windows), you’ll see your new design. Don’t be too tough on yourself. You’re just learning to do that. It looks awesome, sorta. 🙂
As a matter of fact, you just see plain HTML now and that’s not exactly how WordPress works. But no panic! We’ll fix it now. The secret of WordPress (and other CMSs for that matter) is that it loads different portions of its design from different files. And that’s exactly what I’m going to show you now.
We’re going to break our html code into a few chunks and load them from different files to the main one, which is index.php
Header
The code that starts our HTML file and creates the actual header is as follows:
Main Title of Web Page
So, you need to cut that code from your index.php file, create a new file (call it header.php) in your “simplistic” folder, and paste the copied code right in that file. Be sure to save your changes.
Now, instead of the HTML code that you cut from the index.php file, you need to put this PHP code:
Save your modifications.
At this point, your index.php file should have the following code:
Content goes here


